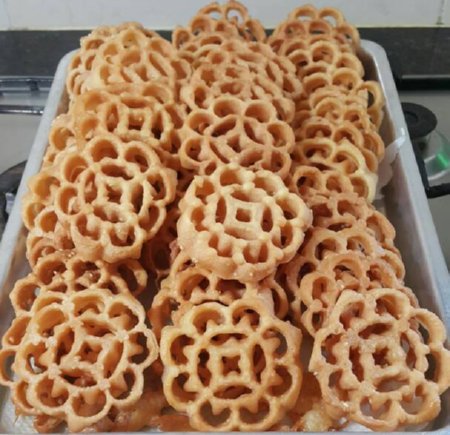
Beehive Cookies 蜂窝饼
Ingredients
80 g Rice flour
35 g Plain flour
1 Egg
70 g Sugar
90g pure coconut milk
40 g Water
A pinch salt
500 ml Oil (for deep-frying)
Bee hives cookies mould
Method
1.In a mixing bowl, combine Egg, sugar, coconut milk, water and salt. Stir
well until the sugar gets dissolved.
2. Sift together the rice flour and plain flour. Add this
flour mixture to the mixing bowl in (1). Whisk until they combine really well.
3. Heat up enough cooking oil in a wok on high heat. Make sure that the oil
is well heated then turn the heat down to medium. Place the brass mould
into wok and let sit and preheat for about a minute.
4. Transfer the mould into the batter and dip just deep enough to
cover the sides neatly, leaving the top surface batter-free. Keep still for
about 5 seconds.
As you remove the brass mould from the oil, lightly shake off any
excess oil. If these extra oil drippings ended up in the batter, they may change
the batter consistency and its clinging ability. As the mould gets dipped into
the batter, you will hear some faint sizzling sounds as the batter starts
adhering to the mould. Leave undisturbed for about 5 seconds to secure the
adhesion before lifting the mould up and away.
5. Transfer the mould into the hot oil, keeping it immersed for about 15
seconds. Lightly shake to free the cookie and leave the mould in the hot oil.
As you plunge the mould with the batter back into the hot oil, make sure that
the mould does not come into contact with the bottom of the wok. Leave it fully
immersed in mid-oil while you make the 15-second countdown. That 15 seconds let
the batter cook and take shape lightly. Shaking the batter off too soon and too
hard will make the outermost layer "open up".
There is a chance that the cooking oil is still a bit too hot and the first few
cookies mayl get burnt. But as the frying goes, the batter will tame the heat
down gradually. Check the heat about every 5 cookies and adjust it
accordingly in between medium and medium-high.
6. Let the first cookie fry while you bring in the second cookie repeating
steps (4) - (5)
With the second cookie in the wok, I likewise let it cook on the mould for
about 15 seconds before shaking it free. By now the first cookie would have just
picked up a tinge of browning. You will notice how the browning is usually
concentrated on the bottom half while the floating top will appear paler in
color.
Using the mould, I would lightly place it on top of the first cookie so that the
whole cookie gets immersed in the hot oil (again make sure the cookie doesn't
touch the wok). Hold it there for another 10 to 15 seconds. The wave action from
the heat beneath the wok will continue shaping the cookie. Now you can let it
float and brown a little more on its own. No flipping required. Leave the
mould in the hot oil meanwhile getting it ready for the next cookie.
7. When the first cookie has turned golden brown, remove the cookie and drain
on a sieve.
The cookie takes its final shape the moment it gets removed from the oil and
exposed to the cool air, hardening them. When you remove the cookie from the
oil, be sure to use either a flat spatula/sieve or the cookie will take whatever
shape you let it rest on. Turn the cookie over as it rests on the spatula/sieve.
The gravity will keep the cookie structure intact and neat (especially the outer
layer). Let it cool down lightly before transferring it to a plate lined with a
paper towel, face down.
8. Repeat steps (4) - (7) until all the batter has been used up.
When the batter level gets too low for the mould to be fully dipped into, pour
the batter into a smaller bowl .
9. Let cool completely and store in air-tight containers.